
Related Articles

Adobe CC TypeKit is an amazing feature of Creative Cloud for syncing your used fonts every computer you use Adobe CC. But sometimes you use a font from TypeKit and you want to send this CC project to somewhere but they can not use that project properly with missing fonts.
Now I will explain how to download your synced fonts to your computer.
P.S. Most TypeKit Fonts are copyrighted. This lesson is for only educational and personal usage. Please be aware of disturbing or copying copyrighted fonts may cause copyright infringement and use it your own risk!
Now, let’s start..
Make sure, you have installed Adobe Creative Cloud Desktop App as signed in and your TypeKit fonts are synced and make sure you are a registered user of Adobe Creative Cloud.
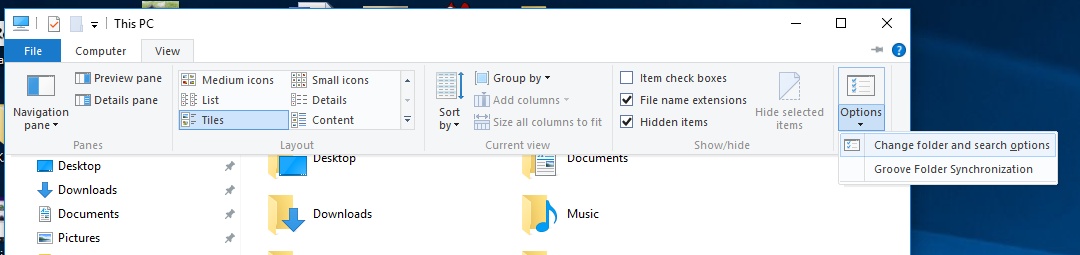
Firstly make sure that your hidden files is visible on Windows Settings.

From “Change folder and search options” select “Show hidden files, folders and drives”

Press [Windows Key + X] and select Command Prompt (Admin) or from Run you can type cmd

Copy this command to your Command Prompt Window;
xcopy %APPDATA%\Adobe\CoreSync\plugins\livetype\r %USERPROFILE%\Desktop\TKFonts
——– 2. way (if xcopy doesn’t work)
or you can navigate to
%APPDATA%\Adobe\CoreSync\plugins\livetype\r
or
C:\Users\—your username—\AppData\Roaming\Adobe\CoreSync\plugins\livetype\r
and copy all hidden files to a folder
——

It will ask F or D..
Press D
Copy process will start..
And you will have a folder named TKFonts on your Desktop..

Make it visible and writeable..

Press OK and open this TKFonts folder on your desktop.. You will see a lot of files with to extension..
These are your synced fonts and lets rename all..
Open your command prompt again and paste this code;
ren %USERPROFILE%\Desktop\TKFonts\*.* *.otf

Now open TKFonts folder again, you will see all fonts are .otf fonts now..
To check fonts names, right click on title bar of folder and enable [Title]

Now you can see the fonts names on detailed view..
That’s all folks,
Stay in Fxfx,
Caner